|
This week, we started video design in Adobe Premiere. I have been using Premiere for a few years now and would say that I think I am proficient in it. However, I am still learning how to make videos better. I need to increase my video skills because you can't make a living in the film industry if you make bad films. To further my learning in video production, I looked for articles. I found an article called 10 Simple Tips To Make Home Videos Look Professional. Most of the tips are mainly about shooting video on a mobile phone; however, they apply to most other recording devices. I'm not going to bore you with listing all ten of the tips; instead, I'm going to talk about what I learned. I learned that when you are filming, you should avoid watching what you're filming. You should be looking at the camera or phone, depending on what your filming on. That makes sense because if you're looking at the scene, you wouldn't be paying attention to what is actually being recorded. Making sure that your video is in focus is very important. No one wants to watch a blurry video. Another thing that they suggest, is to use a grid. Using a grid can help to make sure the video is at the correct angle. I was surprised to learn that you should avoid zooming on phones. According to the article, you should physically move closer to the subject then move away. I found another article called How to Create a Good Video: 11 Steps (with Pictures). According to the article, you should always do a shot test before you record. That is something that I admit have never really done. I've always just gone out and started filming. Angles are very important because they can help set the scene. I learned something very interesting; you should use simple transitions. I usually either use a crossfade, but didn't know that the ones like spinning and melting don't make your video cool. One thing that really sticks is step five, to be alive. According to the article, you should use limited hand gestures. That is definitely a problem for me because I use hand gestures when talking in front of people and explaining information. The next time I make a video, I will make sure to utilize these steps and tips. Things to remember when shooting a video:
Works Cited
Coelho, Sherwin. “10 Simple Tips To Make Home Videos Look Professional.” MakeUseOf, 18 Jan. 2017, www.makeuseof.com/tag/10-simple-tips-to-record-great-looking-home-videos/. wikiHow. “How to Create a Good Video.” WikiHow, WikiHow, 5 Aug. 2018, www.wikihow.com/Create-a-Good-Video.
0 Comments
Last week we finished up working on designing audio in Adobe Audition. I had trouble finishing everything on time; however, I was able to finish everything by the time we started the new unit. One thing that I noticed in reviewing my work was that my audio was not very good quality. Audio is a big part of the film industry, therefore, I need to learn how to improve my audio quality in my work. To accomplish improving my skills, I searched for some articles on tips on how to improve audio quality. I found two articles on enhancing audio quality: 10 Easy Tips for Professional Audio Quality and Top 7 Tips for Better Audio Recording. The first top seven tip is to use a high-quality microphone. According to the article, the mics in cameras are not very good quality. Using an external mic makes dialogue more clear. Tip two is monitor the sound, which can be accomplished with headphones. You get more authentic sounds if the headphones are higher quality. The third tip is to limit background noises, which I did not do very well in my audio novel. I feel that in my audio novel, the background noises were very distracting. Tip four is to turn off the music. This one was surprising to me. I didn't know that it is better to add your music later on and not record with the video. The fourth tip is to record background sound. The background sounds they mention are not the same as background noises; these are sounds specific to video. The example they use is if you're at a carnival, use the music of a ride or the sound of popping popcorn. When you use background sounds, it makes it so the watcher feels like they are there too. Tip six is to watch out for wind. If your shooting outside, the wind creates noises that can be distracting. I just learned that you can use a fuzzy sock to minimize the sound of the wind. Tip seven is to add it later, which is pretty straightforward. The other article is more about how to improve the quality through editing. A tip that really stuck with me was to loosen up before recording. I guess if you're loose, then your recording won't be boring and stiff. Another tip that they had was to use a mic stand, which I didn't even know was a thing. I will definitely use some of these tips the next time I record audio. Tips to remember:
Works Cited
Lyles, Toby LylesToby, et al. “10 Easy Tips for Professional Audio Quality.” Copyblogger, 4 July 2017, www.copyblogger.com/professional-audio/. Siegchrist, Gretchen. “Ways to Make Your Audio Recordings Better.” Lifewire, Lifewire, www.lifewire.com/better-audio-recording-tips-1082310. In this project, I am the writer. I had Shannon critique and edit my writing and as it turns out, my writing was not very good. I am so used to writing history essays and am rusty in creative writing. I want to get better, so I researched how to become a better writer. I found an article on themuse called 10 Simple Ways to Become a Better Writer. According to the article, there are 10 tips. I’m going to talk about the top 5 that really stuck to me. The first one was actually the first tip, which was to get to the point. Before you start writing, you need to know why you are writing and what your goals are. Good writing has one clear purpose. The second tip is to strip it down. You have to remember that if you can’t understand, others probably won’t be able to either. You have to think about if it’s clear and interesting enough to keep the attention of a toddler. The next tip is to write from your happy place. According to the article, research has proven that when you are relaxed and happy, that you are more creative. You need to find what makes you happy and then once in that happy state, start writing. The fourth tip is to give yourself a time limit. You shouldn’t fuss and agonize over one piece of writing. You just need to let it go and move on. If you are happy and relaxed, your work should be good and won’t have to be redone over and over. The last tip is to say it out loud. Reading it out loud helps you determine if it sounds like a robot or a human. I really need to follow that one. 5 Tips:
Works Cited Franzen, Alexandra. “Up Your Writing Game in No Time.” Free Career Advice, The Muse, 11 Aug. 2014, www.themuse.com/advice/10-simple-ways-to-become-a-better-writer. A few years ago I tried to make a game using Unity. I wasn’t successful because I didn’t know the interface or the program. But know I’m determined to increase my skill in Unity. I have access and more knowledge into the program after following some tutorials and researching. Knowing how to use Unity is very important, because many companies use Unity to create their games. To be able to make a functional game, I need to know the interface inside and out.
And to do that I went to the Unity site to find specific information about the interface. There are multiple components that make up the interface, which include the toolbar, multiple windows, and the scene view. The toolbar had tools to let you change the scene view, control the animation, manage layers visibility, edit menu, and access your Unity account. The one difference between the toolbar and the windows is that you can’t move the toolbar like you can the windows. There are three different windows: inspector, hierarchy, and project. The project window shows you the assets that you have available and or imported for your project. The hierarchy window lists all the objects currently in the scene. It also shows how objects are related to each other, specifically if its a “child” or “parent” of each other. The last window is the inspector window, which lets you edit and view the object that is currently selected. You are able to see the different properties. Since not every object is the same, the inspector window may look different depending on the object. The scene view is the last part of the interface. The scene view lets you both edit and move around your scene. Depending on the project, the view will be either 2D or 3D. As you can see, Unity makes it interface very simple and easy to navigate. After learning this information, I will be able to increase my skill using Unity in a more efficient way. Unity:
Technologies, Unity. “Learning the Interface.” Unity - Manual: Learning the Interface, docs.unity3d.com/Manual/LearningtheInterface.html. “Unity.” Unity, unity3d.com/. I know I’ve talked about orthographic sketches before, but I think they are very important and keep seeming to pop up. For instance on this project I had to make orthographic sketches for all of my models. Personally, I don’t like doing orthographic sketches because you have to be proportional. I think doing them digital is harder, but at the same time can be easier. When you do it digital you can use grids and rulers and then snap your object to those lines so everything is exact. More art careers will have you doing orthographic sketches at some part, so learning the best ways to make them and how to improve your skill would be very beneficial.
Being a student who wanted to learn more, I researched orthographic sketches for more insight that might help me understand the process more. I found an article called Orthographic Drawing Rules, which described some rules for making the sketches. There are a few rules in which they go into some detail. The first rule is alignment and they say that if each side of the view is aligned then it will make it easier for others to see that the other sides have the same dimensions. Rule two is one of the hidden and object line rules. The rule isn’t totally a rule, but a good piece of info to know. The article states that the edges that you can’t see should be represented by a dashed line. The third rule is about the number of views. To define a 3D object you only need two views, which is a front and side view. One shows the width and height and the other the height and depth. Those two views will give you the dimensions you need. Rule four is another hidden and object lines rule. According to the article, if your view has a hidden and object line that go through the same locations, you should draw the object line. These rules are more for shapes but good information to know. Rules for Orthographic Sketches to remember:
Works Cited Orthographic Drawing Rules, www.higheredservices.org/HES01/Module_4/module_4_theme_6.html. So, as I got farther into the project, I needed to do more than just my prototyping. I needed to actually produce my product, which was the 3D models. Last year we spend the last half of the year 3D modeling. I admit that I struggled a bit. So for this project, I decided to enrich my knowledge. This project is very important and I want to increase my 3D modeling skill and make my models great for the project. 3D modeling is very important skill to have in any game field, because you never know when it may be needed.
Since I don’t have 3Ds Max at home I searched the internet for some tutorials or articles on how to improve my skills. I came upon a site, which I used a couple years ago for my assessment to get into the Game Design pathways. The site, TinkerCad, had some tutorials in which I did. They were mainly for their site and didn’t apply to 3D modeling in general, but I did notice that the movement controls were similar to 3DS Max’s. I didn’t feel that they applied to what I’m working on in class, so I searched some more for an actual article. I found an article on 3D Horse that had creative ways to improve your 3D modeling skills. I learned some interesting information. According to the article, you can use the text tool to create shapes and curves, which I didn’t think was possible. I don't know if it works in 3Ds Max though. They also said that something that really helps is to study the anatomy of what you're creating. I learned that you should just use the orthographic camera viewport, so you don’t lose your model. Also a good piece of advice they had was if you have a complicated design, that you should divide your model into small pieces. One piece that really caught my attention and that I may try in the distant future if 3Ds Max has this feature is to turn on the Backface Culling, which apparently speeds up the viewport. Helpful Hints for 3D Modeling:
Works Cited “10 Creative Ways You Can Improve Your 3D Modeling Skills.” 3D Horse, www.3dhorse.com/blogs/3d/10-creative-ways-you-can-improve-your-3d-modeling-skills. “Learn.” Tinkercad, www.tinkercad.com/learn/. The project this week was a nondigital project. We had to sketch and make a storyboard. While creating these products, I realized that I can't draw. This is an example of a sketch I made for the project, and as you can see it sucks. On my selected works page you can see some other drawings that I did. I'm trying to get better at traditional drawing, so I decided to research to see how I could improve my skills, 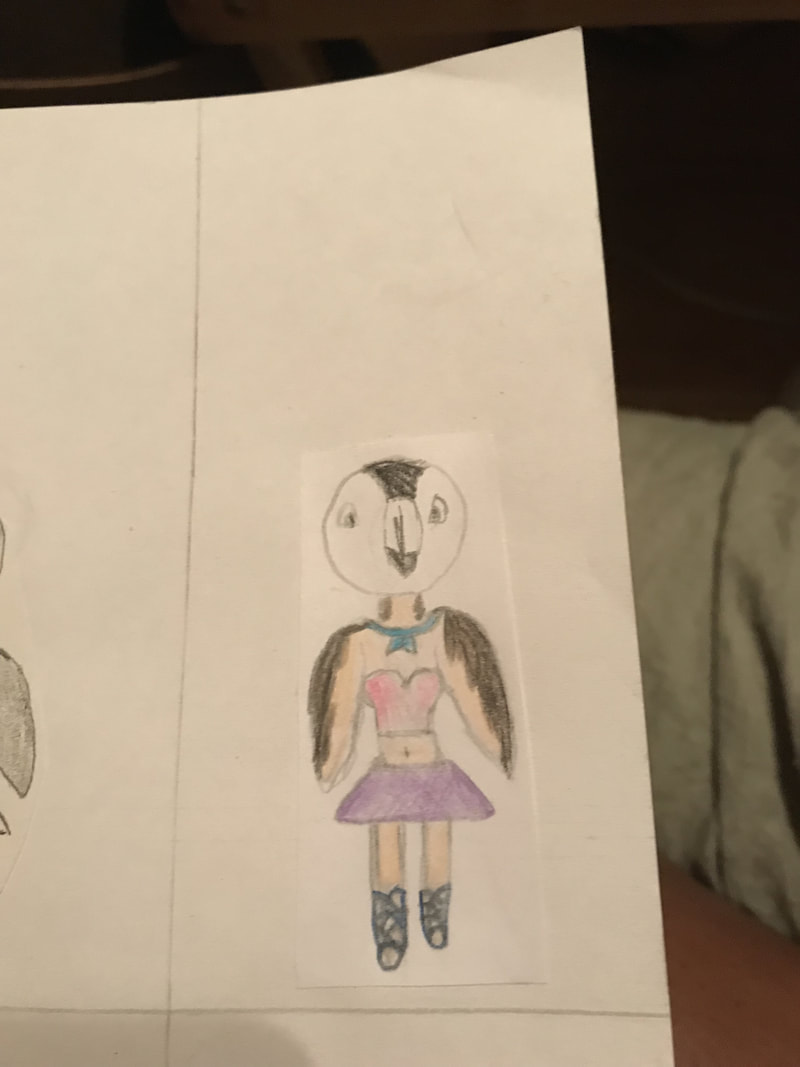 I researched how to improve my drawing skills and found two articles. One was 8 Tips For Improving Your Drawing Skills and the other was Improve Your Drawing Skills in 6 Days. Both articles mentioned that one of the best ways to improve your drawing skill is to draw. One mentions how getting in the correct mindset will help. One thing that I thought was important was how drawing with your elbows helps, because it increases the range of motion. I didn't know that you drew with different parts of your arm. Tips for improving drawing skill:
Works Cited
TheVirtualInstructor Blog, 4 Apr. 2016, thevirtualinstructor.com/blog/improve-your-drawing-skills-in-6-days. Lundgren, Alvalyn. “8 Tips For Improving Your Drawing Skills.” Alvalyn Creative, 17 Nov. 2016, alvalyn.com/8-tips-for-improving-your-drawing-skills/. So, this week we edit our sites and turned it into a digital portfolio. While finding artwork to put on my portfolio, I stopped and looked at everything I made last year. In the beginning of the year, I sucked at everything including making infographics. As you keep going, you see some changes in my work. When you compare my work from last year to this year, there is a change in my infographic making skill. If you look at the infographics, there isn't a big chance in the artwork. All that's different is that it has 3D art. Between the two years, I learned that infographics aren't supposed to be very wordy, and should be more focused on the graphics. The content is important, but it shouldn't be the focus. I learned how everything should be evenly spaced and not crowded. Infographics are very important and useful. You should know how to make an efficient infographic. This is a skill that I intend to keep improving over the years.
Things to remember when making an infographic:
|